User Auth in FastAPI with JWT Tokens
UPDATED ON:

Welcome to Part 7 of Up and Running with FastAPI. If you missed part 6, you can find it here .
This series is focused on building a full-stack application with the FastAPI framework. The app allows users to post requests to have their residence cleaned, and other users can select a cleaning project for a given hourly rate.
Up And Running With FastAPI
In the previous post, we implemented a naive registration system that lets users sign up. We didn’t provide a login mechanism yet, and for good reason. At the moment, new users’ passwords are being stored in plain text and we’re hard-coding in a salt instead of generating one ourselves. In fact, we’re not doing any kind of authentication or authorization, and that’s exactly what we’re going to handle in this post. Brew a fresh cup of coffee, as this is going to be a long one.
Security and New Packages
Before we get going, we’ll need to install a few new packages and rebuild our docker container. Let’s get that out of the way now.
# app
fastapi==0.55.1
uvicorn==0.11.3
pydantic==1.4
email-validator==1.1.1
# db
databases[postgresql]==0.4.2
SQLAlchemy==1.3.16
alembic==1.4.2
# auth
pyjwt==2.0.1
passlib[bcrypt]==1.7.2
# dev
pytest==6.2.2
pytest-asyncio==0.14.0
httpx==0.16.1
asgi-lifespan==1.0.1
We’re installing two new packages here:
-
pyjwt- will be used to encode and decode J SON W eb T okens that will be used to authenticate users. The debates on whether to use JWTs for auth is outside the scope of this article, so we won’t go into that here. All other forms of auth are available with FastAPI as well, so readers who feel uncomfortable with this approach are encourage to try other methods. -
passlib[bcrypt]- The password hashing library we’ll use to avoid storing passwords in plain text. As mentioned in the previous post, storing passwords in plain text is a big no-no.
Go ahead and build the docker container with the new packages.
docker-compose up --build
While we wait for our container to build, let’s chat about security.
So why do we need to hash passwords in the first place? Well, it’s probably easier to think about the problems with the reverse case. If we stored plaint text passwords in our database, anyone who works on our application would be able to see each user’s password whenever they want.
Even if we could completely trust everyone who has access to our database, we can’t trust the rest of the Internet. If our application were to be hacked, every user’s password would be available to that hacker without any additional effort. Given that most people reuse passwords for multiple applications, that situation would be a security nightmare.
Instead, what we’ll do is generate a unique hash for every user’s password upon registration, and store the hashed password in the database instead. So when the user attempts to login, we simply hash the submitted password using the same algorithm and check the output against what we have stored in the database for that user. Using this approach obfuscates the user’s actual password, and still gives us a way to securely authenticate users.
However, there’s a small problem with this case as well. Hackers can create what are known as Rainbow Tables - precomputed hash tables - where they could simply search for the hash and find the corresponding plain-text password. To combat this problem, we’ll add a unique salt to our hashing algorithm.
Any time a user signs up, a new salt is randomly generated for their password and stored in the database. When a user authenticates, the salt and the password are concatenated and processed with our cryptographic hash function. This method mitigates the batch advantage of multi-target attacks by forcing hackers to only crack one password at a time. The process would then be slow and arduous, eliminating the advantage of precomputed hash tables.
Now when a user attempts to login, we have a tried and true method for authentication. We’ll look up the user by username or email address, grab the salt we’ve generated for them, and hash the combination of submitted password and salt. If the output matches what we’ve stored in our database, we consider that user logged in.
So how do we keep users logged in? That’s where JWTs come in. JSON Web Tokens are an open, industry standard method for representing claims securely between two parties.
DISCLAIMER: As with any security system, there are problems with JWTs - but that’s a discussion for another post. For our application, they fit quite nicely.
Users that authenticate successfully will be sent an encoded, stateless token holding just enough information to uniquely identify the user. Any future requests must include that token in the request headers, and that will be how we know who the request is coming from. Tokens expire after a set period of time, so the user won’t be authenticated forever. The developer can determine exactly what time window works best for their own application.
Combining all of those pieces together gives us the system that what we’ll implement here and passlib with pyjwt will be a central part of orchestrating this authentication flow.
Configuring Our Auth Service
As the FastAPI docs state, security is often a complex and “difficult” issue. Readers who are unfamiliar with standard authentication practices are highly encouraged to read the FastAPI docs on security, as they cover a large amount of jargon that will be useful in understanding the parts to come.
Let’s quickly explore this diagram to get a feel for the registration flow we expect users to go through.
So the process can be broken into steps:
- Users send their username, email, and password to our server
- We check for email and username uniqueness. If all is clear, we generate a salt and use it to hash the user’s password. We store the user and their hashed password in our database.
- Taking the user’s username or email address, we encode it into a JSON Web Token and send that token back to the user.
- Any time the user needs to make a request to our API, they include the token we’ve sent them and we identify them by decoding its contents.
We’re going to start by creating an AuthService class that will handle any authentication-related logic. Admittedly, simple functions would probably accomplish the same task. But since we’ll be adding quite a bit of logic over the next couple posts, we’ll stick with a class and refactor as needed.
mkdir backend/app/services
touch backend/app/services/__init__.py
touch backend/app/services/authentication.py
And add the following to the new authentication.py file:
import bcrypt
from passlib.context import CryptContext
from app.models.user import UserPasswordUpdate
pwd_context = CryptContext(schemes=["bcrypt"], deprecated="auto")
class AuthException(BaseException):
"""
Custom auth exception that can be modified later on.
"""
pass
class AuthService:
def create_salt_and_hashed_password(self, *, plaintext_password: str) -> UserPasswordUpdate:
salt = self.generate_salt()
hashed_password = self.hash_password(password=plaintext_password, salt=salt)
return UserPasswordUpdate(salt=salt, password=hashed_password)
def generate_salt(self) -> str:
return bcrypt.gensalt().decode()
def hash_password(self, *, password: str, salt: str) -> str:
return pwd_context.hash(password + salt)
Though relatively small, this utility class provides us with exactly the methods we need to salt our passwords and convert plaintext passwords into hashed ones.
We’ll instantiate a single instance in the services/__init__.py file and use it throughout our application.
from app.services.authentication import AuthService
auth_service = AuthService()
Before we move on to the next part, let’s try out our new service so we get a feel for what’s going on. Let’s enter our docker container and get a python repl going.
docker ps
docker exec -it [CONTAINER_ID] bash
python
Once inside the repl, import the service and test the methods on our AuthService class.
>>> from app.services import auth_service
>>> auth_service.generate_salt()
'$2b$12$bqWai76sZZMTinfd14c0v19'
>>> auth_service.hash_password(password="password", salt="123")
'$2b$12$jNBHX8AT.4d4zHv.NG2wXe1wQ.2Aek56NuYsOJGc.Ny54chnxr'
>>> auth_service.create_salt_and_hashed_password(plaintext_password="password")
UserPasswordUpdate(password='$2b$12$JL1EL/cpZQZQr5tnicref.vBABdynaydMxvXabZzyaFHVz4jpmere', salt='$2b$12$WuTanG12cLaN.9u')
>>> auth_service.hash_password(password="password", salt="123")
'$2b$12$74YNOKh84yamVSc85Dc2Pueybg0gjsA6kc/FqxM53qOdFR5175'
Some interesting things going on here.
Every salt and hashed password generated by our auth_service starts with "$2b$12$". The $2b is the ident and it specifies the version of the bcrypt algorithm used when creating a new hash. The $12$ identifies how many rounds are used to hash the password (technically it’s log rounds, so it actually uses $2^{12}$ here). Feel free to play around with this bcrypt calculator to see how the bcrypt hashing algorithm works right in the browser.
Observant readers may also have identified something rather concerning - we called the auth_service.hash_password twice with the same arguments and got a different output!
What happened?
Anyone familiar with passlib and bcrypt (or readers who’ve read the FAQ for in the passlib docs ) will know that bcrypt automatically generates a salt each time a password is hashed, and stores it in the hash table. That means we don’t even need to explicitly create our own salt or store it in the database with our user. All of that is done for us.
It is nice to understand what’s happening underneath the hood, so we’ll keep our current methodology for now. It won’t affect our auth system, so don’t worry. It’ll just require a bit of extra overhead.
Refactoring User Registration
We’re about ready to bring our password hashing algorithm into our user registration flow, but let’s add a new test first.
# ...other code
from app.services import auth_service
# ...other code
class TestUserRegistration:
# ...other code
async def test_users_saved_password_is_hashed_and_has_salt(
self,
app: FastAPI,
client: AsyncClient,
db: Database,
) -> None:
user_repo = UsersRepository(db)
new_user = {"email": "beyonce@knowles.io", "username": "queenbey", "password": "destinyschild"}
# send post request to create user and ensure it is successful
res = await client.post(app.url_path_for("users:register-new-user"), json={"new_user": new_user})
assert res.status_code == HTTP_201_CREATED
# ensure that the users password is hashed in the db
# and that we can verify it using our auth service
user_in_db = await user_repo.get_user_by_email(email=new_user["email"])
assert user_in_db is not None
assert user_in_db.salt is not None and user_in_db.salt != "123"
assert user_in_db.password != new_user["password"]
assert auth_service.verify_password(
password=new_user["password"],
salt=user_in_db.salt,
hashed_pw=user_in_db.password,
)
We start by creating a new user as before, and also checking that the user exists in the database after the POST request. Afterwards we ensure that the salt we’re storing in the database exists and is not the "123" we currently have hardcoded in. We also check that the password we have stored in the database is not the one the user originally sent to the server. Finally, we assert that the verify_password function - which we haven’t written yet - tells us that the hashed version of the submitted password matches the one we have stored.
Run the test and watch it fail. We can fix this easily by removing the “123” we’ve hardcoded in, and we will. We’ll also use our new auth_service to handle password hashing for us. Head into the UsersRepository and update it with the following:
from pydantic import EmailStr
from fastapi import HTTPException
from starlette.status import HTTP_400_BAD_REQUEST
from databases import Database
from app.db.repositories.base import BaseRepository
from app.models.user import UserCreate, UserUpdate, UserInDB
from app.services import auth_service
GET_USER_BY_EMAIL_QUERY = """
SELECT id, username, email, email_verified, password, salt, is_active, is_superuser, created_at, updated_at
FROM users
WHERE email = :email;
"""
GET_USER_BY_USERNAME_QUERY = """
SELECT id, username, email, email_verified, password, salt, is_active, is_superuser, created_at, updated_at
FROM users
WHERE username = :username;
"""
REGISTER_NEW_USER_QUERY = """
INSERT INTO users (username, email, password, salt)
VALUES (:username, :email, :password, :salt)
RETURNING id, username, email, email_verified, password, salt, is_active, is_superuser, created_at, updated_at;
"""
class UsersRepository(BaseRepository):
def __init__(self, db: Database) -> None:
super().__init__(db)
self.auth_service = auth_service
async def get_user_by_email(self, *, email: EmailStr) -> UserInDB:
user_record = await self.db.fetch_one(query=GET_USER_BY_EMAIL_QUERY, values={"email": email})
if not user_record:
return None
return UserInDB(**user_record)
async def get_user_by_username(self, *, username: str) -> UserInDB:
user_record = await self.db.fetch_one(query=GET_USER_BY_USERNAME_QUERY, values={"username": username})
if not user_record:
return None
return UserInDB(**user_record)
async def register_new_user(self, *, new_user: UserCreate) -> UserInDB:
# make sure email isn't already taken
if await self.get_user_by_email(email=new_user.email):
raise HTTPException(
status_code=HTTP_400_BAD_REQUEST,
detail="That email is already taken. Login with that email or register with another one."
)
# make sure username isn't already taken
if await self.get_user_by_username(username=new_user.username):
raise HTTPException(
status_code=HTTP_400_BAD_REQUEST,
detail="That username is already taken. Please try another one."
)
user_password_update = self.auth_service.create_salt_and_hashed_password(plaintext_password=new_user.password)
new_user_params = new_user.copy(update=user_password_update.dict())
created_user = await self.db.fetch_one(query=REGISTER_NEW_USER_QUERY, values=new_user_params.dict())
return UserInDB(**created_user)
We’re attaching the auth_service to our UsersRepository and applying the create_salt_and_hashed_password method to the user’s plaintext password. Once we get the UserPasswordUpdate that’s returned from our method, we use it to update the new_user before exporting the model to a dictionary and passing it to our REGISTER_NEW_USER_QUERY.
At this point, our test is almost passing. Run it again and it should inform us that the AuthService object has no verify_password method. Let’s go ahead and take care of that now.
# ...other code
class AuthService:
def create_salt_and_hashed_password(self, *, plaintext_password: str) -> UserPasswordUpdate:
salt = self.generate_salt()
hashed_password = self.hash_password(password=plaintext_password, salt=salt)
return UserPasswordUpdate(salt=salt, password=hashed_password)
def generate_salt(self) -> str:
return bcrypt.gensalt().decode()
def hash_password(self, *, password: str, salt: str) -> str:
return pwd_context.hash(password + salt)
def verify_password(self, *, password: str, salt: str, hashed_pw: str) -> bool:
return pwd_context.verify(password + salt, hashed_pw)
The verify_password method uses our previously defined password context to verify the password/salt combo with our hashed password stored in the database.
Run the tests again and watch them pass.
At this point, we have the foundation of a legit authentication system set up. However, we still have no way of keeping the user logged in, so we’ll have handle that part next.
JSON Web Tokens
Readers who unfamiliar with token-based authentication are highly encouraged to read JWT.io’s introductory article found here . For the initiated, the basics are as follows:
A JWT is simply an encoded string containing three parts separated by periods. The example provided in the previously mentioned article states that they follow this general structure: xxxxxx.yyyyyy.zzzzz. These three parts are called the header , payload , and signature , respectively.
Users’ usernames (or email addresses) will be encoded in the payload and will be used to identify them in every request across our API. The encoding algorithm will be stored in the header, and the signature will be a string composed of the other two parts, base64 encoded, and then signed using a secure secret.
Readers who feel that the previous paragraphs are way over their heads should check out JWT.io’s debugger tool found here and get a feel for how JWTs are created.
Fortunately, we won’t have to worry too much about how to encode the JWT, as we have the pyjwt library to handle that for us. It is important for us to know what they’re made of, however, as we’ll be composing them in the next couple sections.
Token Models and Updating the Config
At this point, we’re ready to start defining some Pydantic models that we’ll use to validate the shape of our auth tokens. Create a new token.py file in our models directory like so:
touch backend/app/models/token.py
And add the following code:
from datetime import datetime, timedelta
from pydantic import EmailStr
from app.core.config import JWT_AUDIENCE, ACCESS_TOKEN_EXPIRE_MINUTES
from app.models.core import CoreModel
class JWTMeta(CoreModel):
iss: str = "phresh.io"
aud: str = JWT_AUDIENCE
iat: float = datetime.timestamp(datetime.utcnow())
exp: float = datetime.timestamp(datetime.utcnow() + timedelta(minutes=ACCESS_TOKEN_EXPIRE_MINUTES))
class JWTCreds(CoreModel):
"""How we'll identify users"""
sub: EmailStr
username: str
class JWTPayload(JWTMeta, JWTCreds):
"""
JWT Payload right before it's encoded - combine meta and username
"""
pass
class AccessToken(CoreModel):
access_token: str
token_type: str
Ok, let’s break down what’s going on here.
We’re using multiple models to compose the payload that we’ll encode into our JWTs. The JWTMeta has most of the attributes our payload will need:
-
iss- the issuer of the token (that’s us) -
aud- who this token is intended for -
iat- when this token was issued at -
exp- when this token expires and is no longer valid proof that the requesting user is logged in.
We’re setting default values for all of them, but we can also customize any attribute as needed. Our JWTCreds model will store the fields that we’ll use to identify the user - in this case the email and username. As we build our JWT, we’ll combine these two models and encode the results to serve as our token payload.
That encoded string will be attached to an access token and sent to the user once we’ve successfully authenticated them. The token_type attribute on our AccessToken model gives us the flexibility to modify our authentication system at a future date.
And that’s it! Not too bad, right?
Before we move on, let’s talk about the items we’re importing from config. It’s a good idea to standarize how we handle JWTs across our application, so this is the perfect time to beef up our config.
The first thing we’ll need it a secret key. There are many ways to get one, but the easiest is to run this in the terminal:
openssl rand -hex 32
That’ll give us a string that looks like dada789f4abcdef14.... Copy that and open up the core/config.py file. Remove the CHANGEME that we defaulted our SECRET_KEY to in our second post. Let’s also add other JWT-specific options we’ll need.
from databases import DatabaseURL
from starlette.config import Config
from starlette.datastructures import Secret
config = Config(".env")
PROJECT_NAME = "phresh"
VERSION = "1.0.0"
API_PREFIX = "/api"
SECRET_KEY = config("SECRET_KEY", cast=Secret)
ACCESS_TOKEN_EXPIRE_MINUTES = config(
"ACCESS_TOKEN_EXPIRE_MINUTES",
cast=int,
default=7 * 24 * 60 # one week
)
JWT_ALGORITHM = config("JWT_ALGORITHM", cast=str, default="HS256")
JWT_AUDIENCE = config("JWT_AUDIENCE", cast=str, default="phresh:auth")
JWT_TOKEN_PREFIX = config("JWT_TOKEN_PREFIX", cast=str, default="Bearer")
POSTGRES_USER = config("POSTGRES_USER", cast=str)
POSTGRES_PASSWORD = config("POSTGRES_PASSWORD", cast=Secret)
POSTGRES_SERVER = config("POSTGRES_SERVER", cast=str, default="db")
POSTGRES_PORT = config("POSTGRES_PORT", cast=str, default="5432")
POSTGRES_DB = config("POSTGRES_DB", cast=str)
DATABASE_URL = config(
"DATABASE_URL",
cast=DatabaseURL,
default=f"postgresql://{POSTGRES_USER}:{POSTGRES_PASSWORD}@{POSTGRES_SERVER}:{POSTGRES_PORT}/{POSTGRES_DB}"
)
We’ve removed the default from our SECRET_KEY, meaning it’ll throw an error if none is found in our .env file. Go ahead and add the secret key openssl just generated for us to our .env file.
Besides the items we’re using in our token models, we’ve also defined the jwt algorithm we’ll use to encode tokens and the token prefix we’ll expect to see in the authorization header users will send for authenticated requests.
Make sure to stop the currently running docker container and start it up again. Once that’s ready to go, we’re on to some tests!
Test Fixtures for Users and Token Headers
This is going to be a heavily involved section, so buckle up.
We’ll need to handle a few new wrinkles associated with creating and testing users, so we’ll start by updating our conftest.py file with a new fixture:
# ...other code
from app.models.user import UserCreate, UserInDB
from app.db.repositories.users import UsersRepository
# ...other code
@pytest.fixture
async def test_user(db: Database) -> UserInDB:
new_user = UserCreate(
email="lebron@james.io",
username="lebronjames",
password="heatcavslakers",
)
user_repo = UsersRepository(db)
existing_user = await user_repo.get_user_by_email(email=new_user.email)
if existing_user:
return existing_user
return await user_repo.register_new_user(new_user=new_user)
For the most part, the test_user fixture is standard. It instantiates a UserCreate model with whatever test data we want, checks if a user exists in the database with the same email, and returns that user if a record is found. Otherwise, it creates a new user and then returns the UserInDB model.
So why are we checking for user existence? Remember that our database persists for the duration of the testing session. With that in mind, also recall that both the username and email attributes have unique constraints on them. This is important, since we don’t want more than one user with the same email or with the same username in our system.
Accordingly, if we ran this test_user fixture more than once, pytest would throw an error stemming from the postgres unique constraint we’ve attached to both of these attributes. Curious readers should feel free to remove the existing_user check at a later point to observer this error in action.
Let’s also go ahead and write some tests that use the test_user fixture, beginning with auth token creation.
Update the tests/test_users.py file with the following:
from typing import List, Union, Type, Optional
import pytest
import jwt
from pydantic import ValidationError
from starlette.datastructures import Secret
# ...other code
from app.core.config import SECRET_KEY, JWT_ALGORITHM, JWT_AUDIENCE, JWT_TOKEN_PREFIX, ACCESS_TOKEN_EXPIRE_MINUTES
from app.models.token import JWTMeta, JWTCreds, JWTPayload
# ...other code
class TestAuthTokens:
async def test_can_create_access_token_successfully(
self, app: FastAPI, client: AsyncClient, test_user: UserInDB
) -> None:
access_token = auth_service.create_access_token_for_user(
user=test_user,
secret_key=str(SECRET_KEY),
audience=JWT_AUDIENCE,
expires_in=ACCESS_TOKEN_EXPIRE_MINUTES,
)
creds = jwt.decode(access_token, str(SECRET_KEY), audience=JWT_AUDIENCE, algorithms=[JWT_ALGORITHM])
assert creds.get("username") is not None
assert creds["username"] == test_user.username
assert creds["aud"] == JWT_AUDIENCE
async def test_token_missing_user_is_invalid(self, app: FastAPI, client: AsyncClient) -> None:
access_token = auth_service.create_access_token_for_user(
user=None,
secret_key=str(SECRET_KEY),
audience=JWT_AUDIENCE,
expires_in=ACCESS_TOKEN_EXPIRE_MINUTES,
)
with pytest.raises(jwt.PyJWTError):
jwt.decode(access_token, str(SECRET_KEY), audience=JWT_AUDIENCE, algorithms=[JWT_ALGORITHM])
@pytest.mark.parametrize(
"secret_key, jwt_audience, exception",
(
("wrong-secret", JWT_AUDIENCE, jwt.InvalidSignatureError),
(None, JWT_AUDIENCE, jwt.InvalidSignatureError),
(SECRET_KEY, "othersite:auth", jwt.InvalidAudienceError),
(SECRET_KEY, None, ValidationError),
)
)
async def test_invalid_token_content_raises_error(
self,
app: FastAPI,
client: AsyncClient,
test_user: UserInDB,
secret_key: Union[str, Secret],
jwt_audience: str,
exception: Type[BaseException],
) -> None:
with pytest.raises(exception):
access_token = auth_service.create_access_token_for_user(
user=test_user,
secret_key=str(secret_key),
audience=jwt_audience,
expires_in=ACCESS_TOKEN_EXPIRE_MINUTES,
)
jwt.decode(access_token, str(SECRET_KEY), audience=JWT_AUDIENCE, algorithms=[JWT_ALGORITHM])
A bunch of fun things happenings here.
First, we’re testing to ensure that we can use our AuthService class to create an access token for a user. We decode the token using the pyjwt package and assert that it contains the username of the user who we created the token for.
Second, we test for the case where no user is encoded into the token, and ensure that we don’t see anything in the payload.
Last, we pass invalid secrets and audience strings to the create_access_token_for_user method and ensure that the pyjwt package raises a PyJWTError.
Run those tests and watch them fail.
We haven’t built our create_access_token_for_user method, so let’s do that now.
import jwt
import bcrypt
from datetime import datetime, timedelta
from passlib.context import CryptContext
from app.core.config import SECRET_KEY, JWT_ALGORITHM, JWT_AUDIENCE, JWT_TOKEN_PREFIX, ACCESS_TOKEN_EXPIRE_MINUTES
from app.models.token import JWTMeta, JWTCreds, JWTPayload
from app.models.user import UserPasswordUpdate, UserInDB
pwd_context = CryptContext(schemes=["bcrypt"], deprecated="auto")
class AuthException(BaseException):
pass
class AuthService:
def create_salt_and_hashed_password(self, *, plaintext_password: str) -> UserPasswordUpdate:
salt = self.generate_salt()
hashed_password = self.hash_password(password=plaintext_password, salt=salt)
return UserPasswordUpdate(salt=salt, password=hashed_password)
def generate_salt(self) -> str:
return bcrypt.gensalt().decode()
def hash_password(self, *, password: str, salt: str) -> str:
return pwd_context.hash(password + salt)
def verify_password(self, *, password: str, salt: str, hashed_pw: str) -> bool:
return pwd_context.verify(password + salt, hashed_pw)
def create_access_token_for_user(
self,
*,
user: UserInDB,
secret_key: str = str(SECRET_KEY),
audience: str = JWT_AUDIENCE,
expires_in: int = ACCESS_TOKEN_EXPIRE_MINUTES,
) -> str:
if not user or not isinstance(user, UserInDB):
return None
jwt_meta = JWTMeta(
aud=audience,
iat=datetime.timestamp(datetime.utcnow()),
exp=datetime.timestamp(datetime.utcnow() + timedelta(minutes=expires_in)),
)
jwt_creds = JWTCreds(sub=user.email, username=user.username)
token_payload = JWTPayload(
**jwt_meta.dict(),
**jwt_creds.dict(),
)
# NOTE - previous versions of pyjwt ("<2.0") returned the token as bytes insted of a string.
# That is no longer the case and the `.decode("utf-8")` has been removed.
access_token = jwt.encode(token_payload.dict(), secret_key, algorithm=JWT_ALGORITHM)
return access_token
We start by simply returning None if we’re not passed a user or if the user isn’t an instance of UserInDB. If all is well we craft the token’s meta and creds, then use them to create our token payload. Using the JWT_ALGORITHM we selected in config and our SECRET_KEY cast to a string, we encode the payload into our token and return the string contents.
Run the tests again and they should all pass.
With our token logic in place, we should update our UserPublic model to also store an optional access token. Open up the models/user.py and update it like so:
# ...other code
from app.models.token import AccessToken
# ...other code
class UserPublic(IDModelMixin, DateTimeModelMixin, UserBase):
access_token: Optional[AccessToken]
By accepting an optional access_token attribute, we can now return the user along with their token as soon as they’ve registered.
Let’s do that now.
Head into api/routes/users.py and update our register_new_user route with the following:
# ...other code
from app.models.token import AccessToken
from app.services import auth_service
# ...other code
@router.post("/", response_model=UserPublic, name="users:register-new-user", status_code=HTTP_201_CREATED)
async def register_new_user(
new_user: UserCreate = Body(..., embed=True),
user_repo: UsersRepository = Depends(get_repository(UsersRepository)),
) -> UserPublic:
created_user = await user_repo.register_new_user(new_user=new_user)
access_token = AccessToken(
access_token=auth_service.create_access_token_for_user(user=created_user), token_type="bearer"
)
return UserPublic(**created_user.dict(), access_token=access_token)
At this point, our registration route should return a valid access token. Because we’ve added an additional attribute to the UserPublic model, our successful registration test is no longer passing. That’s a simple fix.
# ...other code
from app.models.user import UserCreate, UserInDB, UserPublic
# ...other code
class TestUserRegistration:
async def test_users_can_register_successfully(
self,
app: FastAPI,
client: AsyncClient,
db: Database,
) -> None:
user_repo = UsersRepository(db)
new_user = {"email": "shakira@shakira.io", "username": "shakirashakira", "password": "chantaje"}
# make sure user doesn't exist yet
user_in_db = await user_repo.get_user_by_email(email=new_user["email"])
assert user_in_db is None
# send post request to create user and ensure it is successful
res = await client.post(app.url_path_for("users:register-new-user"), json={"new_user": new_user})
assert res.status_code == HTTP_201_CREATED
# ensure that the user now exists in the db
user_in_db = await user_repo.get_user_by_email(email=new_user["email"])
assert user_in_db is not None
assert user_in_db.email == new_user["email"]
assert user_in_db.username == new_user["username"]
# check that the user returned in the response is equal to the user in the database
created_user = UserPublic(**res.json()).dict(exclude={"access_token"})
assert created_user == user_in_db.dict(exclude={"password", "salt"})
# ...other code
We can now run our tests again and watch them all pass.
Trying Out Our New Access Tokens
With all of that finished, we should now be able to see the token returned when we register a user.
Let’s head to FastAPI’s interactive docs and test it out.
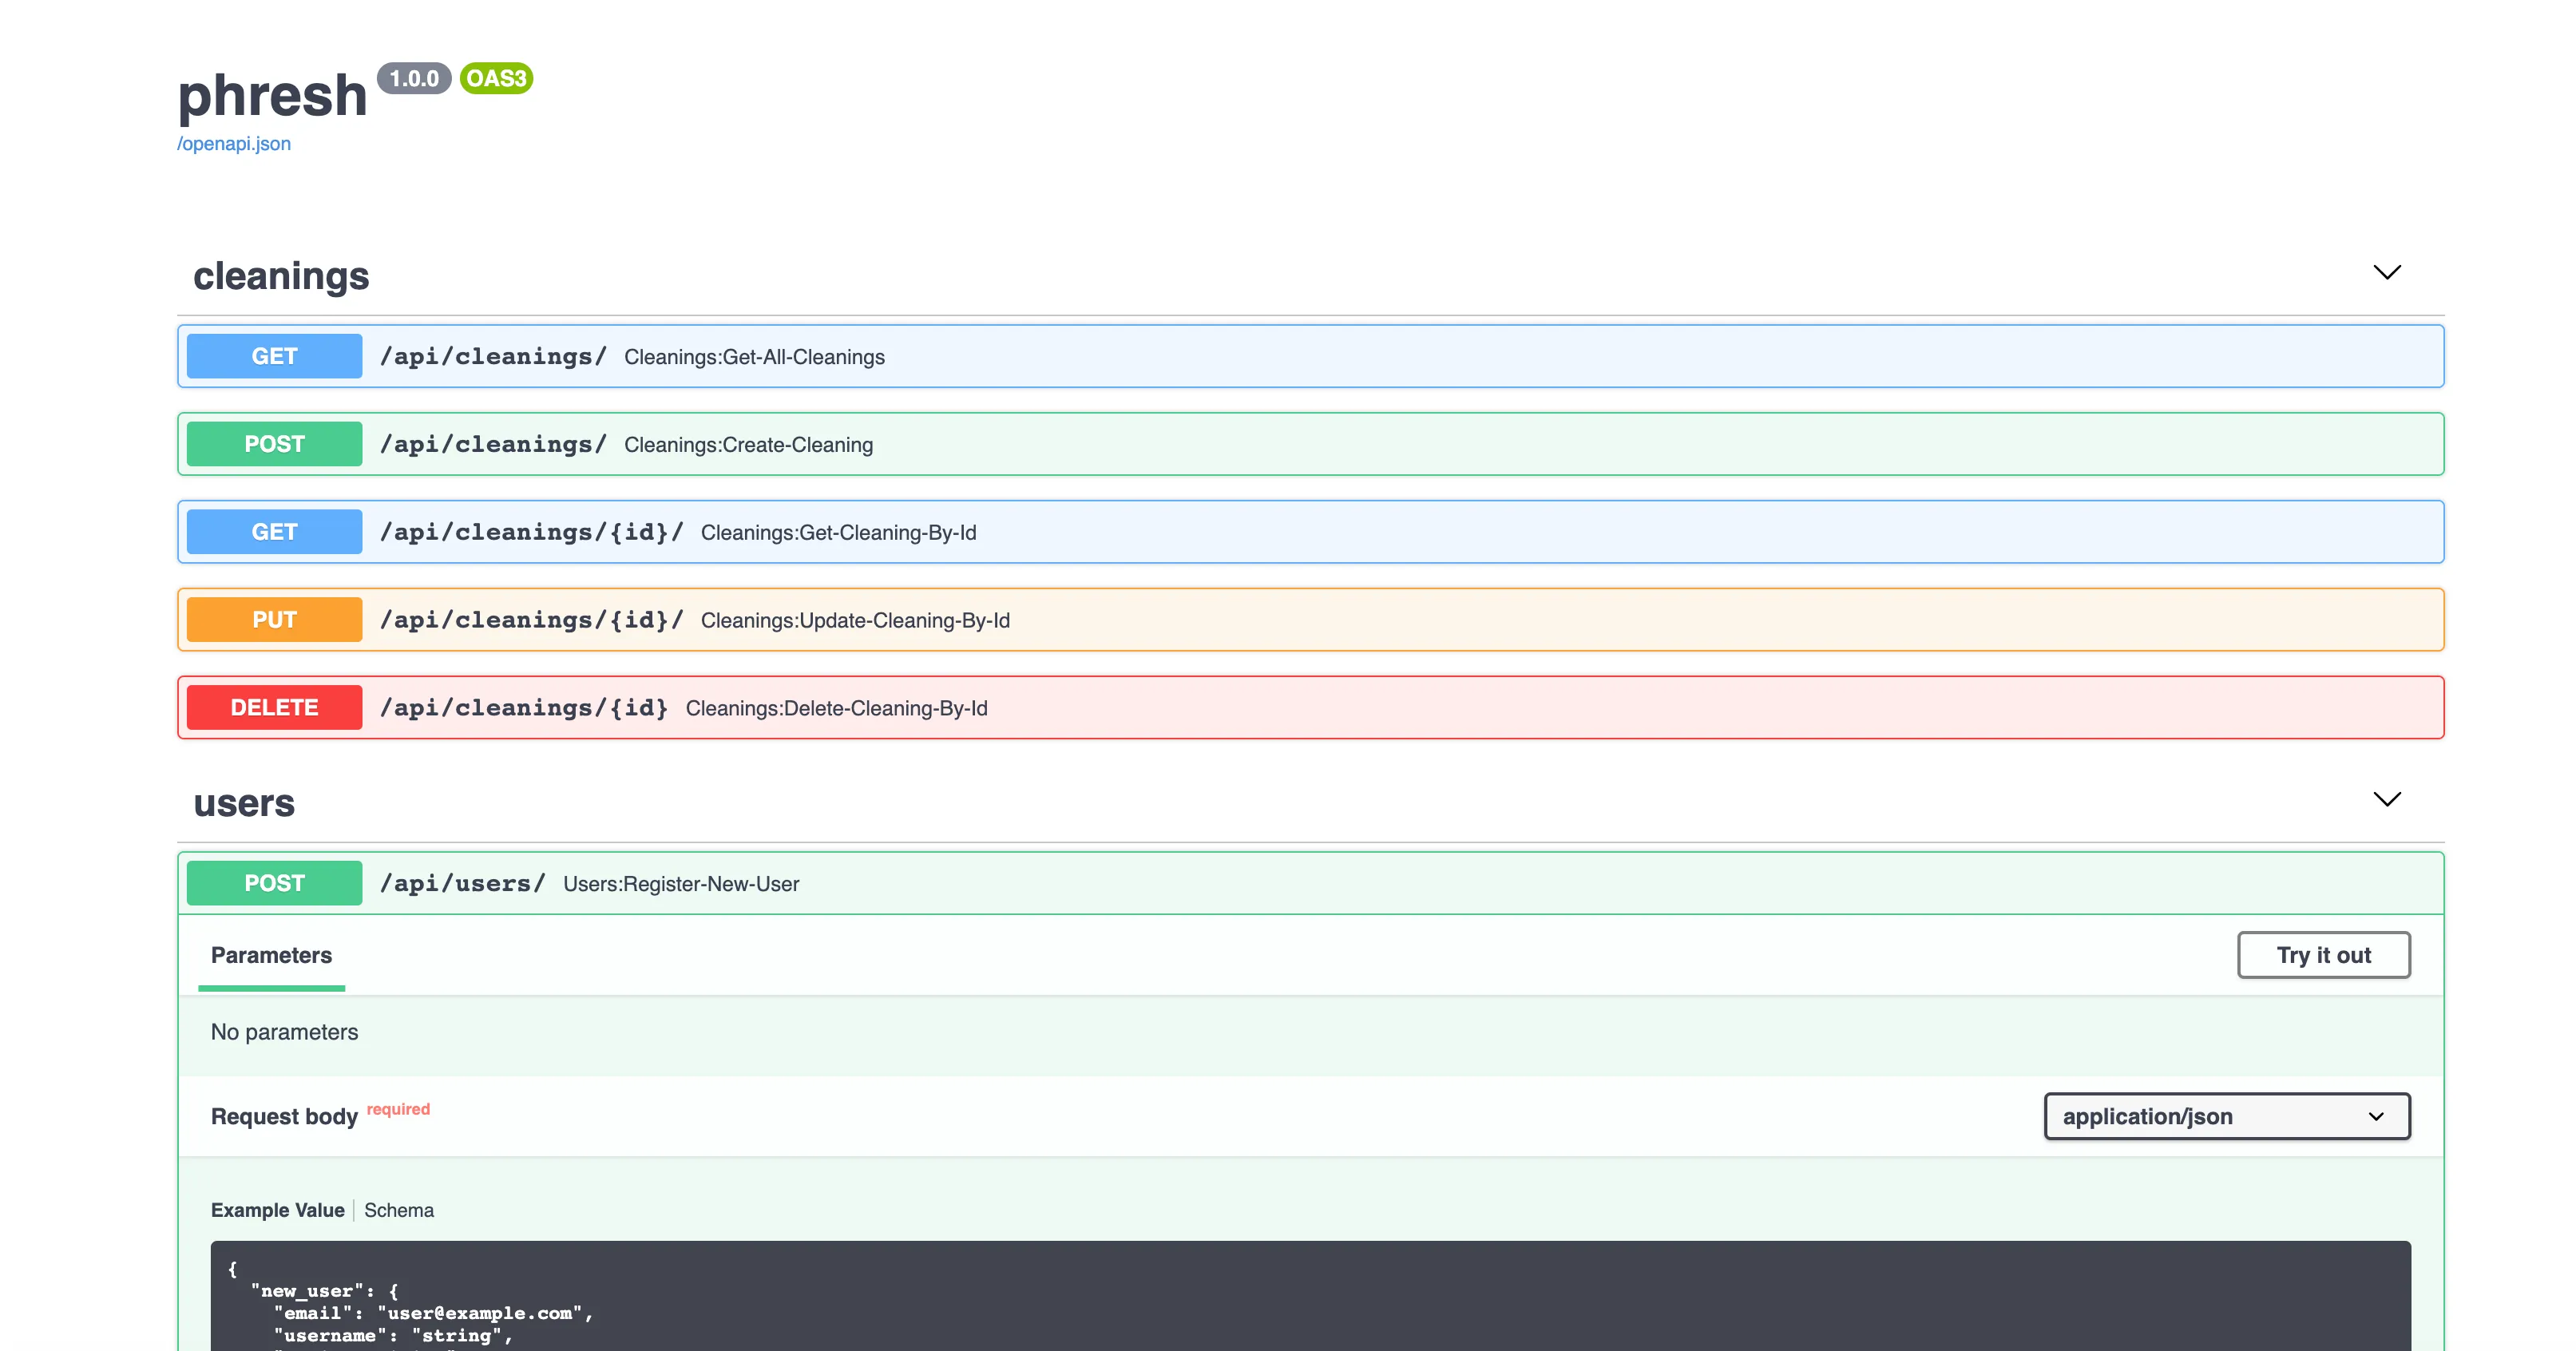
We enter in a user email, a unique username, and a password at least 7 characters in length and tada! Our access token is attached the response body - along with the rest of the user. We’re now ready to start implementing a login flow.
But we’ll save that until the next post.
Wrapping Up and Resources
There’s a lot packed into this one post, and we’re only just getting started. In the next post, we’ll dive a little further into security and handle login, along with some authorization dependencies.
- FastAPI Users repo - A great FastAPI repo that I’ve used to design much of the auth architecture for this app
- FastAPI Project Generator Template repo
- FastAPI Security docs
- Passlib docs
- bcrypt calculator - play around with the bcrypt hashing algorithm right in the browser.
- JWT.io - Great resource for learning about how JSON Web Tokens work
- Pyjwt docs
- Reference to the git commit that updated the
pyjwtpackage to return the access token as a string instead of bytes. - Toptal: High-performing Apps with Python – blog post focused on building a todo app from scratch with FastAPI using the SQLAlchemy ORM.
Github Repo
All code up to this point can be found here:
Special thanks to Joao Ant for correcting errors in the original code.

Designing a Robust User Model in a FastAPI App
Auth Dependencies in FastAPI